
WordPress is a free and open-source content management system written in PHP and paired with a MySQL or MariaDB database. Features include a plugin architecture and a template system, referred to within WordPress as Themes
today we will teach you how to install WordPress or any other related CMS easily on your Linux Server.
WordPress Server Requirements
- Operating System: a minimal installation of CentOS or RHEL server with LEMP stack installed.
- Disk Space: 200MB for the WordPress, and 5GB is probably a realistic minimum of storing content.
- Processor: 1GHz (min), 2GHz dual-core or more recommended.
- Memory: 512MB (min), 1GB or more is recommended. 8GB plus is likely on a large production server.
Step 1 – install LEMP – Nginx – MariaDB – PHP
Before you start you need to install LEMP fully on your server so check the blow post :
Step 2 – Set Your Domain for your WordPress website
- You can use your main domain or Start by creating a subdomain that users will use to access the WordPress online. For example, if your domain name is
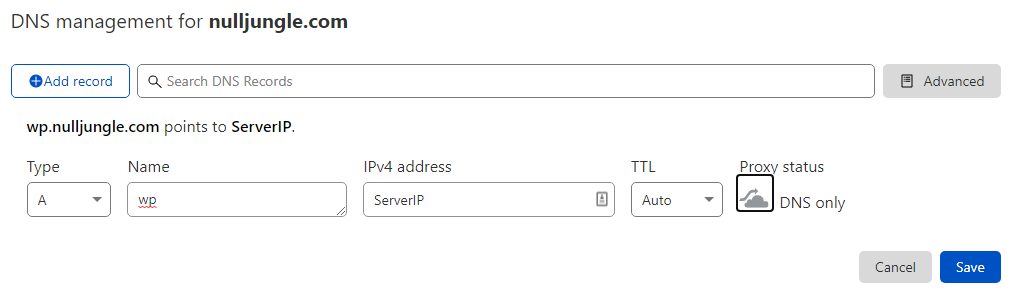
nulljungle.com, you can create a subdomain calledwp.nulljungle.com.
Open your domain name’s advanced DNS settings and add an A record as shown in the following image.
Step 3 – Create Database, DB User and Password
as on LEMP installation you fully configured your MariaDB properly now you need to create a Database plus your user for the WordPress so let’s login to the database console through the SSH :
mysql -u root -pthen you need to enter your root password of the database which has already set for it on the LEMP installation tutorial, then you will see below code :
MariaDB [(none)]>
now you should create database with user and different password and access privilages :
CREATE DATABASE wpdb;
GRANT SELECT,INSERT,UPDATE,DELETE,CREATE,CREATE TEMPORARY TABLES,DROP,INDEX,ALTER ON wpdb.* TO 'wpuser'@'localhost' IDENTIFIED BY 'YourPassword';
FLUSH PRIVILEGES;
exit
** on the top command you can change ‘ wpdb ‘ as the database name, ‘wpuser‘ as your database user, and ‘ YourPassword‘ as your database password to your own unique one. Always use strong passwords for better security. ***
Step 4 – Installing WordPress
by default the directory Nginx is using for the website file is here: /usr/share/nginx/html/
- we are going to change this so let’s create a folder on the home folder:
cd /home- install some packages for download WordPress and unzipping zip files:
dnf install zip unzip wget nano -y- now download the latest WordPress Files:
wget https://wordpress.org/latest.zipunzip latest.zipchmod 775 -R /home/wordpress
chown nginx:nginx -R /home/wordpress- now you need to add nginx configuration to read files from /home/wordpress folder
nano /etc/nginx/conf.d/wordpress.confadd below:
server{
   listen 80;
    server_name wp.nulljungle.com;
    root        /home/wordpress;
    index       index.php;

    location / {
        try_files $uri $uri/ /index.php?$query_string;
    }

    location ~ ^(.+\.php)(.*)$ {
        fastcgi_split_path_info ^(.+\.php)(.*)$;
        fastcgi_index           index.php;
        fastcgi_pass            php-fpm;
        include                 /etc/nginx/mime.types;
        include                 fastcgi_params;
        fastcgi_param           PATH_INFO       $fastcgi_path_info;
        fastcgi_param           SCRIPT_FILENAME $document_root$fastcgi_script_name;
}
}
change wp.nulljungle.com to your own domain or subdomain.
Save the file and close it. (with ctrl+x)
- Then check the NGINX configuration for correctness, if it is Ok, restart the nginx and php-fpm services to apply the recent changes:
nginx -t
systemctl restart nginx
systemctl restart php-fpm
- If you have SELinux enabled on your system, then run the following commands to set the correct context for accessing the WordPress web files on the server:
setsebool -P httpd_can_network_connect on
chcon -R --type httpd_sys_rw_content_t /home/wordpress
Step 5 – Complete Installing WordPress through Online Wizard
- To access the WordPress web installer, open your web browser, and navigate using the Domain you created above at the First Step:
http://wp.nullJungle.com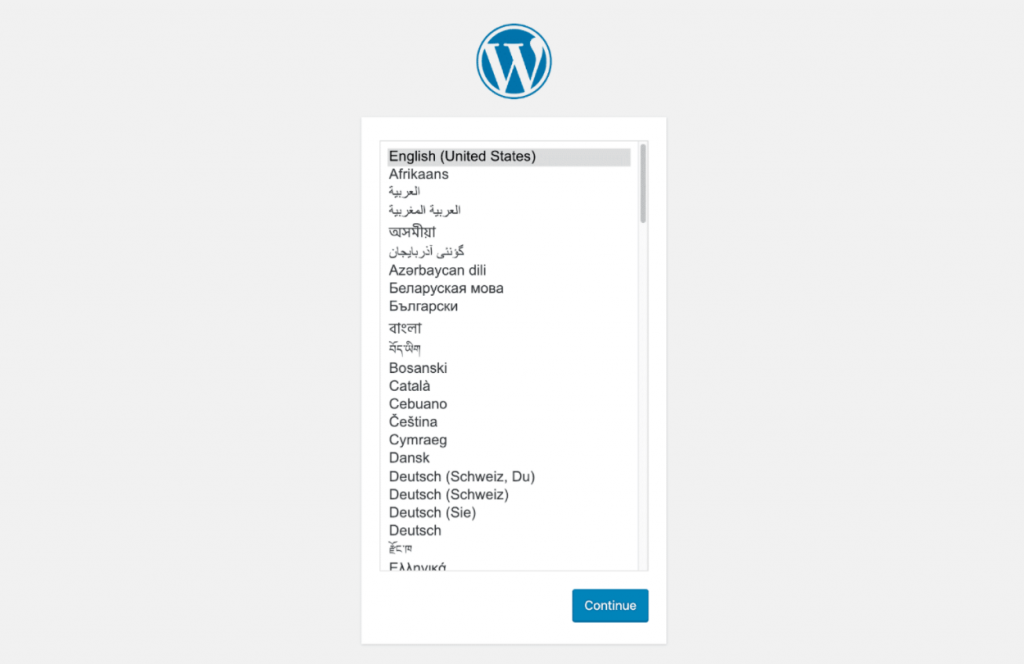
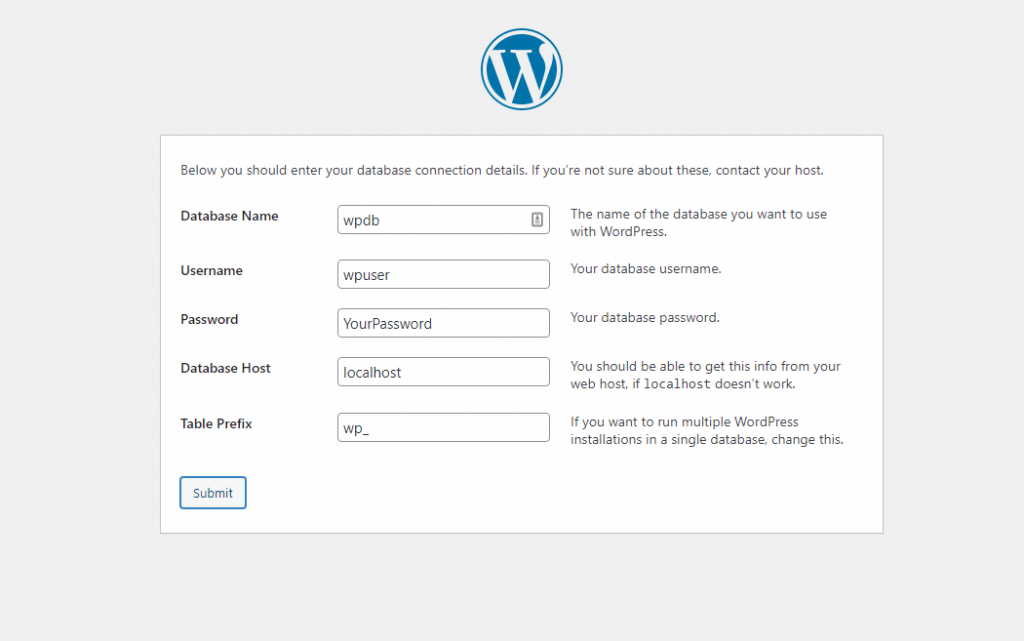
- You can continue and on datbase setting you should enter your database setting as you created on Step 3 :
- Next, you need to register your website name and create admin user and password and then finish installtion.
Step 6 – Setting Up HTTPS on WordPress Site Using Let’s Encrypt – Free
HTTPS adds the first layer of security to your site to enable secure communications between your users and the WordPress website(especially the NGINX web server which receives requests and delivers responses).
You can either purchase an SSL/TLS certificate from a commercial CA or use Let’s Encrypt which is free and recognized by all modern web browsers. For this guide, we will use Let’s Encrypt to add a Free SSL certificate for your website.
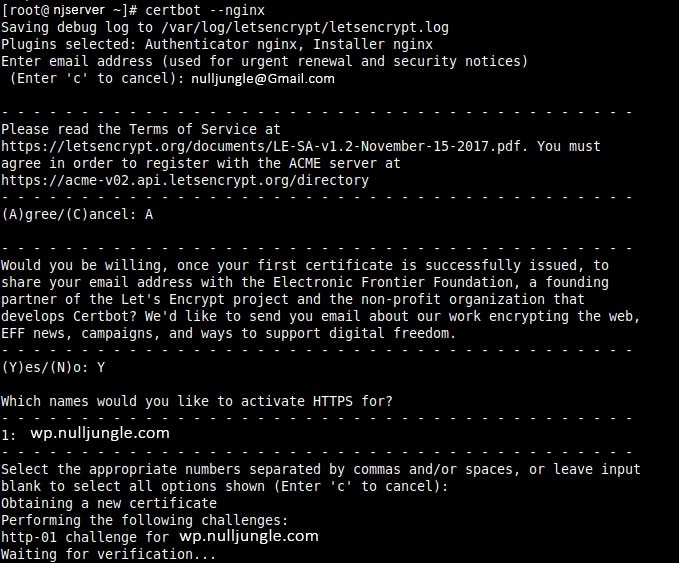
- The Let’s Encrypt Certificate deployment is automatically managed using the certbot tool. You can install certbot and other required packages with the following command:
dnf install certbot python3-certbot-nginx -y- Then run the following command to get a Let’s Encrypt certificate and have Certbot edit your NGINX configuration automatically to serve it (it will also configure HTTP to be redirected automatically to HTTPS).
certbot --nginx
- Then run the following command to enable automatic renewal of the Let’s Encrypt SSL/TLS certificate:
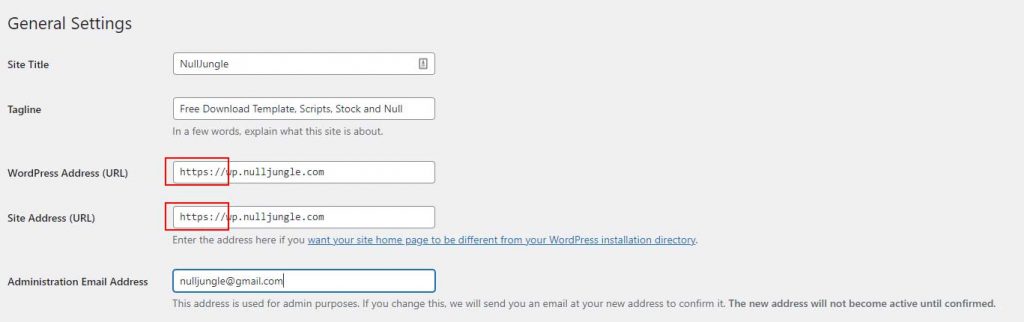
echo "0 0,12 * * * root python3 -c 'import random; import time; time.sleep(random.random() * 3600)' && certbot renew -q" | sudo tee -a /etc/crontab > /dev/nullNow as you set up the SSL setting you can change your website URL to HTTPS on the WordPress setting :
Now one more time reset all services :
systemctl restart nginx
systemctl restart php-fpm
Now you can check your website through HTTPS
Comment and ask your question if you have any.
