In this tutorial, we are going to show you how you can easily create your own VPN server and use it for your personal daily use both on your computer and mobile phones. stop paying for the public VPN server.
Features of your own VPN server:
- High security, as you know no one else is using your server and you are the only one having access to.
- Maybe our internet provider block all public VPN servers so You can create your customized VPN server.
Prerequisites
- CentOS 8 server with at least 512MB RAM
- Need a Domain for your VPN server here we are suing vpn.NullJungle.com
Step 1- Install OpenConnect VPN Server (OCserv) on CentOS 8
First your need to log in to your Centos 8 Server with SSH
then run the below command for installing the EPEL repository.
sudo dnf install epel-release
sudo dnf install ocserv
Step 2 – Open Ports in Firewall
here we are going to use 443 Port as VPN server ports so lets open these ports on default centos 8 firewall :
sudo firewall-cmd --permanent --add-port=443/tcp
sudo firewall-cmd --permanent --add-port=443/udp
Also we are going to generate SSL with let’s encrypted so we need to open Port 80 too :
sudo firewall-cmd --permanent --add-port=80/tcpnow reload firewall to everything take effect.
sudo systemctl reload firewalldStep 3 – Install Let’s Encrypt and Generate SSL
Run the following command to install the Let’s Encrypt client (certbot) on CentOS 8.
sudo dnf install certbotGenerate and obtain SSL:
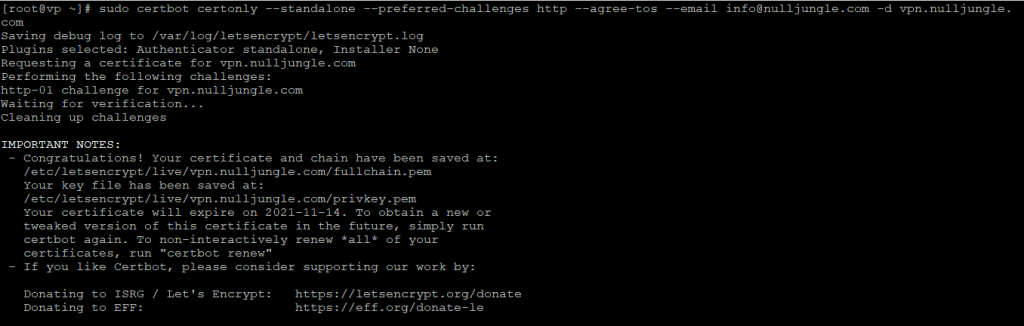
the below code will generate SSL for our domain: vpn.nulljungle.com
sudo certbot certonly --standalone --preferred-challenges http --agree-tos --email info@nulljungle.com -d vpn.nulljungle.comfor your own domain, you need to change “vpn.nulljungle.com” and email “info@nulljungle.com”.
Step 4 – Edit OCserv VPN Server Configuration File
Now you should edit configuration files of OCcserv and set some settings :
sudo nano /etc/ocserv/ocserv.confirst, configure password authentication. By default, password authentication through PAM (Pluggable Authentication Modules) is enabled, which allows you to use CentOS system accounts to login from VPN clients. This behavior can be disabled by commenting out the following line.
replace :
auth = "pam"with :
auth = "plain[passwd=/etc/ocserv/ocpasswd]"then you should set SSL key and cert file, find the blow files :
server-cert = /etc/pki/ocserv/public/server.crt
server-key = /etc/pki/ocserv/private/server.key
replace them with your generated SSL file which you did on step 3:
server-cert = /etc/letsencrypt/live/vpn.yourdomain.com/fullchain.pem
server-key = /etc/letsencrypt/live/vpn.yourdomain.com/privkey.pem
It’s recommended to enable LZ4 compression, so uncomment the following line.
compression = trueand use some more settings for better VPN server :
max-clients = 0max-same-clients = 0keepalive = 30try-mtu-discovery = trueidle-timeout=1200
mobile-idle-timeout=2400default-domain = vpn.yourdomain.comipv4-network = 10.10.10.0
ipv4-netmask = 255.255.255.0tunnel-all-dns = truedns = 8.8.8.8
dns = 8.8.4.4Save and close the file.(ctrl+x)
Step 5 – Creating VPN Accounts
sudo ocpasswd -c /etc/ocserv/ocpasswd usernameYou will be asked to set a password for the user and the information will be saved to /etc/ocserv/ocpasswd file. To reset the password, simply run the above command again.
now just start your ocserv services:
sudo systemctl start ocservand enable it on boot time
sudo systemctl enable ocservStep 6 – Enable IP Forwarding in Linux Kernel
In order for the VPN server to route packets between VPN client and the Internet, we need to enable IP forwarding. Edit sysctl.conf file.
sudo nano /etc/sysctl.confAdd the following line at the end of this file.
net.ipv4.ip_forward = 1Save and close the file. Then apply the changes with the below command. The -p option will load sysctl settings from /etc/sysctl.conf file. This command will preserve our changes across system reboots.
sudo sysctl -pStep 7 – Configure IP Masquerading in Firewall
Run the following command to enable IP masquerading for the 10.10.10.0/24 subnet in the server firewall. as we set before on ocserv configuration files.
sudo firewall-cmd --permanent --add-rich-rule='rule family="ipv4" source address="10.10.10.0/24" masquerade' now reset the firewall to take effect
sudo systemctl reload firewalldStep 8 – Connect to your Own VPN Server
It’s time for your testing. You can connect to your VPN server with Windows, Linux, Android and IOS.
– windows :
Download Cisco AnyConnect Secure Mobility Client: here | 12.93 MB
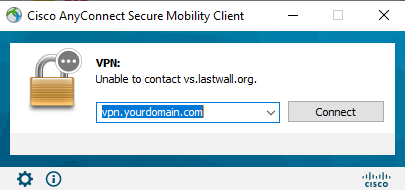
Enter your domain which you set on this tutorial and push connect button.
it will ask you the username and password which you set on Step 5.
now it will connect you and you can use your VPN server.
– Android :
Download here: https://play.google.com/
– IOS :
Download here: https://apps.apple.com/
If you have any problem or question you can ask us down below on comment section
